
Repairing torn curtains is a common household challenge, but it doesn’t have to be a costly one. Imagine the beauty of your room restored, all thanks to a few simple steps! This comprehensive guide will teach you how to repair torn curtains effectively, saving you money and time. We’ll cover everything from assessing the damage to choosing the right tools and techniques, and even explore when professional help might be necessary. This article is structured to provide clear and actionable steps, from initial diagnosis to final restoration. We will tackle identifying the type of tear, choosing the right materials for mending, and the techniques for effective repairs, along with situations where professional help is warranted.
Assessing the Damage: Identifying the Type of Tear
Understanding Tear Types
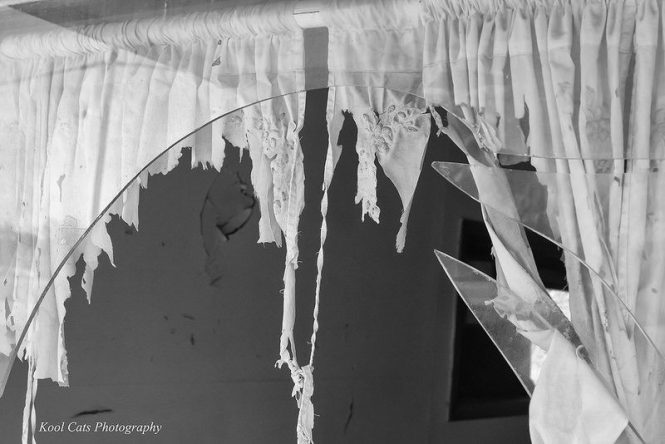
Tears in curtains can range from simple, straight rips to complex, irregular tears, or even more complex fraying issues. Accurately identifying the tear type is crucial for selecting the appropriate repair method. Straight tears are easier to fix using simple techniques, while more complex tears may require specialized methods or professional intervention.
Material Considerations
The material of your curtains significantly impacts the repair process. Different fabrics (like silk, linen, or velvet) require different approaches. For example, delicate fabrics may benefit from a more subtle repair approach, whereas heavier fabrics may allow more robust techniques.
Tools and Supplies
Gathering the right tools and supplies is essential for a successful repair. Essential items include scissors, needle and thread (matching the curtain’s color), a sewing machine (optional), and a seam ripper. You’ll also need a measuring tape to ensure accuracy in your repairs.
Visual Inspection and Documentation
Thoroughly inspect the tear, noting the width, length, and the position on the curtain. Take pictures of the damage for future reference during the repair process. This documentation is invaluable if you need to consult a guide or return to the process later.
Determining the extent of repair
Small tears can be mended using basic techniques, whereas larger or complex tears might require a professional tailor or more advanced sewing skills.
Choosing the Right Repair Method
Simple Repairs: Straight Tears and Small Holes
Straight tears or small holes can be repaired with a simple running stitch or by using fusible interfacing to mend the tear with an iron-on patch. These methods are quick, relatively easy to learn, and appropriate for beginners. For small holes, simply use the running stitch to stitch up the damaged area carefully.
Advanced Techniques: Irregular Tears and Fraying
Irregular tears or extensive fraying may necessitate a more involved approach, often incorporating a patch or careful sewing stitches. For more complex issues, consider using a patch to cover the area of the tear to secure it better. Iron-on patches are a simple way to address this issue, and can add strength and durability to the repair.
Using an Iron-on Patch
Iron-on patches can be strategically used to strengthen the area and conceal the tear or fraying. This method offers an aesthetically pleasing solution and also adds strength to the damaged fabric, especially with heavier curtain materials. These patches offer versatility to address different tear types and make the overall look of the curtain appear more intact.
Understanding Professional Intervention
In some cases, professional help might be the best solution. If the tear is large, complex, or located in a high-traffic area, consulting a professional curtain repair service is a more reliable option. Consider this if you don’t have the necessary sewing skills or expertise in dealing with delicate fabrics.
Identifying the Best Repair Methods
Assess the nature of the tears, carefully choosing the most appropriate repair technique for a successful outcome.
Preparing the Curtain for Repair
Cleaning and Preparing the Fabric
Before starting any repair, ensure the fabric is clean and free of loose threads or debris. A thorough cleaning step removes excess dirt and debris, improving the visibility of the damaged area and making the repair process easier.
Marking the Tear
Carefully mark the tear with a fabric pen or marking tool. Precise marking ensures accurate stitches and a neat finish, especially if you are using advanced repair techniques. This will help you maintain accuracy during the repair process.
Pre-treatment for Specific Fabrics
Some fabrics may require pre-treatment before repair. For example, delicate fabrics like silk may need to be treated with a specific solution or stabilized to prevent further damage or thread breakage. Understanding fabric properties helps to effectively avoid potential issues during the repair process.
Tools and Supplies Checklist
Double-check you have all the required tools, such as scissors, needle, thread, and any specific materials needed, like iron-on patches. The appropriate preparation of the fabric is essential before engaging in the actual repair process.
Protecting the Surrounding Area
Cover the surrounding area of the tear with a piece of fabric or paper to prevent accidental damage during the repair process. Protecting the surrounding area maintains the integrity of the curtain and allows for a more seamless and effective repair process.
Mending the Tear
Basic Running Stitch Technique
For small, straight tears, a running stitch is a practical solution. Carefully stitch along the edges of the tear to close the gap. Ensure the stitches are evenly spaced and close to the edges to minimize bulk and maintain the appearance of the curtain. Make sure that the stitching is invisible and even to improve the visual appeal of the curtain and maintains the desired appearance.
Using Patches for Repairs
For more significant repairs, iron-on patches provide an effective solution. Carefully cut out a patch that is slightly larger than the tear and use an iron to adhere it to the damaged area. This method strengthens the curtain and improves the appearance of the damaged area.
Applying Glue or Adhesive
Specialized glues or adhesives are specifically designed for fabric repairs. Carefully apply the glue along the edges of the tear, pressing it firmly against the fabric. Ensure that you follow the manufacturer’s instructions to prevent issues and achieve a proper outcome.
Advanced Techniques for Complex Tears
Using sewing machines for complex repairs enables a more secure closure for the tear, creating a more seamless and long-lasting repair.
Stitching and Securing Patches
Careful stitching of the patch secures the repair process, ensuring that the patch is firmly secured to the curtain. Appropriate stitching is essential to ensure that the patch and the existing curtain match.
Finishing Touches
Inspecting the Repair
Thoroughly inspect the repair to ensure that the edges are neat and the stitches are even. Make sure that the mended area blends seamlessly with the rest of the curtain, ensuring that the repair process meets the highest standards.
Additional Treatments for Durable Repairs
In cases where extra strength is desired, additional treatments, like reinforcing with an extra layer of fabric, or using fabric glue for a more secure hold, can offer further protection to the affected area.
Ironing the Mending Area
If required, iron the mended area to ensure that the stitches or glue adheres properly and creates a smooth finish. Ironing the mending area is essential for ensuring a durable and consistent result after mending the area.
Finishing Stitches or Patches
Trim any excess thread and ensure that all stitches or patches are completely secured to prevent fraying or further damage. Finalizing the repair is an important step in achieving a professional outcome.
Evaluating Repair Success
Consider the specific needs of the area being repaired to assess the success of the repair process.
Frequently Asked Questions
Q: What are the different types of tears in curtains that can be repaired at home?
A: Tears in curtains can range from simple straight rips to complex, irregular tears. Small tears are more easily managed using basic repair techniques like running stitches or iron-on patches, while complex issues often require a more professional approach. The fabric’s material type also plays a crucial role in choosing the appropriate repair method.
Q: Can I repair a large tear in my curtains myself, or should I hire a professional?
A: Determining whether to repair a large tear yourself or hire a professional depends on your sewing skills and the complexity of the tear. Large or complex tears might require advanced techniques or specialized tools that an experienced tailor might have. If you are uncertain about your abilities, a professional curtain repair service is likely a safer approach, especially for delicate materials. If the damage is extensive, professional help might be necessary to ensure a lasting repair that matches the overall aesthetic of the curtain.
In conclusion, repairing torn curtains is a manageable task that often requires basic tools and some DIY know-how. By following these steps and considering the type of fabric, you can effectively mend your curtains and save money. If the damage is extensive, consider professional curtain repair services for a more reliable outcome. Ready to tackle your torn curtains? Get started today!