Fixing paint cracks is a common DIY project that can breathe new life into your home or furniture. Whether you’re dealing with minor imperfections or extensive damage, this guide provides practical strategies to mend cracks easily and efficiently. Understanding the causes of paint cracks is the first step toward effective repair. This article will cover various techniques for different types and severity of cracks, from small hairline cracks to larger gaps. We’ll explore DIY solutions, preventative measures, and when to consult a professional.
Understanding Paint Cracks
Common Causes of Paint Cracks
Paint cracks can stem from various issues, including poor surface preparation, inappropriate paint choice, and environmental factors. For instance, changes in temperature and humidity can cause expansion and contraction of the substrate, leading to cracking. Improper preparation, such as failing to properly prime or sand the surface, can also contribute to cracking. In addition, using paints that aren’t suited for the specific surface or environment can also result in cracking. Furthermore, settling of the building structure or furniture can also lead to paint cracking.
Identifying the Types of Cracks
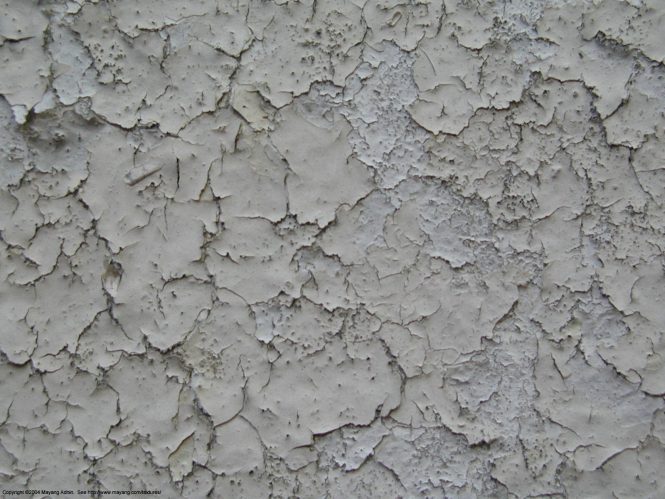
Before you begin repairing the cracks, it’s crucial to assess the type and extent of the damage. Hairline cracks are minor and often appear as thin lines. Larger cracks, on the other hand, could be more substantial and require more extensive repairs. Knowing the type of crack will help you choose the appropriate repair method.
Choosing the Right Repair Materials
Essential Tools and Supplies
Gathering the right tools is crucial for successful repair. Essential tools include putty knives, sandpaper, masking tape, a sealant, a paint scraper, and appropriate paint depending on the type of surface.
Preparing the Surface for Repair
Cleaning and Removing Loose Paint
Thoroughly clean the area around the crack to remove dust, dirt, and any loose paint. Use a scraper to remove any flaking or loose paint from the crack itself. Proper cleaning will ensure good adhesion of the repair material.
Applying the Repair Material
Filling and Leveling Cracks
Once the surface is clean, use a suitable filler to fill the crack. Use a putty knife to smooth the filler. Ensure the filler is level with the surrounding surface. Allow the filler to dry completely according to the product instructions. Don’t apply too much pressure while leveling; this could cause the filler to crack or crumble.
Finishing Touches
Sanding and Painting
After the filler has dried, lightly sand the area with fine-grit sandpaper to smooth out any imperfections. Apply a coat of paint or sealant that matches the surrounding surface.
Additional Tips for Effective Paint Crack Repair
Using Primers
Primers are essential for creating a uniform surface. They create a stronger bond between the filler and the surface and prevent subsequent cracking.
Professional vs. DIY Repair
Understanding When to Seek Professional Help
While many minor cracks can be addressed with DIY techniques, more extensive damage might require professional intervention. Professional painters possess the expertise, tools, and materials necessary for tackling complex situations. In such cases, consulting an expert can save you time and ensure lasting results.
Preventing Future Paint Cracks
Maintaining the Substrate’s Integrity
Consistent maintenance plays a crucial role in preventing paint cracks. Regular inspection and prompt repairs of underlying issues, like structural problems or moisture damage, can significantly mitigate the risk of future damage.
Choosing the Right Paint
Matching Paint to Surface and Environment
Selecting the appropriate paint is equally important for preventing cracks. Consider the type of surface and its environment to select the best paint, especially if the surface is subject to significant temperature fluctuations or moisture variations.
Frequently Asked Questions
Q: What if the cracks are deep?
A: If the cracks are deep, consider using a more robust filler, like a specialized epoxy filler. A deep crack often indicates a structural issue or significant movement. In such cases, it is advisable to consult a professional to determine the root cause and ensure the repair is done correctly. Furthermore, be cautious about using excessive force, as this could exacerbate the damage.
Q: How can I prevent future paint cracks?
A: Preventative measures are essential to avoid future cracking. Ensure your surfaces are properly prepared before painting; this includes priming and sanding. Use high-quality paints specifically designed for the type of surface being painted. Consider repainting on a regular schedule, typically every few years, to maintain the integrity of the paint.
In conclusion, fixing paint cracks requires a systematic approach that considers the cause, severity, and desired outcome. By following the steps outlined above, you can effectively address these imperfections and restore your surfaces to their former glory. Remember to prioritize preventative measures to avoid future crack development. For more comprehensive solutions or complex situations, consider consulting a professional painter. Visit our website for additional resources and to explore our other services.