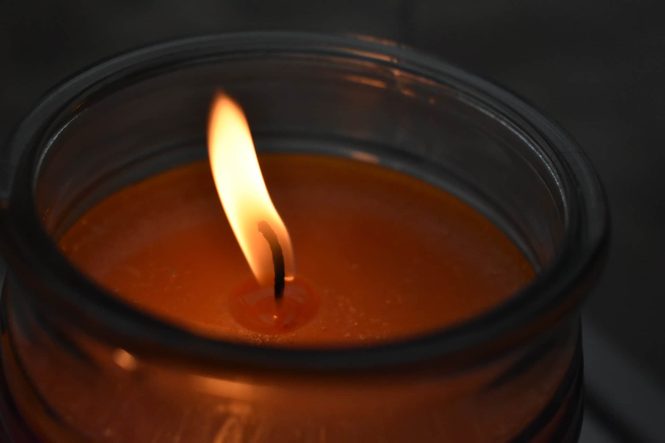

Repairing broken candles is a simple and rewarding process that can save you money and add a personal touch to your home décor. Imagine having a cherished candle, damaged by a mishap, but instead of replacing it, you can give it a new life through creative candle repair. Candle repair is not just about aesthetics; it’s a skill that allows you to extend the life of your favorite candles, fostering environmental consciousness. This guide tackles this common candle problem and will walk you through effective techniques and necessary tools for repairing broken candles. We will cover the different types of candle damage and how to tackle each type. This article is structured to cover a comprehensive guide to candle repair, with each section focusing on a specific aspect of the process.
Understanding Candle Damage
Identifying the Types of Damage
Candle damage comes in various forms, each requiring a specific approach for repair. Some candles might have a small crack, while others might be completely shattered. Identifying the extent and type of damage is crucial for determining the right repair method. Broken pieces, cracked surfaces, and melted wax are among the common issues that need attention. Accidents can happen, but with the right steps and techniques, you can make your damaged candles look new again. A careful inspection will help you assess the damage and choose the most appropriate repair technique.
Selecting the Right Tools and Materials
Once you’ve identified the damage, gathering the right tools and materials is essential. This step ensures a successful repair process. Essential tools may include a hot knife, tweezers, specialized candle repair wax, and a clean work area. The selection of these items is crucial for a safe and effective repair. Some repairs might also require the use of glue, an optional tool for more complex repairs. The precise tools you use depend greatly on the type and severity of the damage.
Preparing the Damaged Candle
Cleaning and Preparing the Surface
Before you begin the repair process, ensure the damaged area is clean and free of debris. This step prevents contaminants from interfering with the repair process. Gently remove any loose pieces of wax or debris using a clean cloth or brush. This step ensures a smooth and effective repair process. Thorough cleaning will help improve the final product quality.
Assessing the Damage Further
It’s important to assess the damage a second time after cleaning. The damage might look different after removing dirt or debris. This additional step ensures that the selected repair method will be effective for the damage that you’ve identified.
Applying the Repair Wax
Choosing the Right Wax Type
Different types of wax require different repair methods and wax. For instance, paraffin wax repairs might be different from soy wax repairs. The type of wax used in the candle dictates the best approach for repair. Understanding the characteristics of different waxes ensures that you use the appropriate materials. It will also ensure a reliable fix.
Applying the Wax Correctly
Applying the repair wax requires precision and patience. Use a small amount of wax on a hot knife or spatula to create a smooth, uniform layer over the damaged area. Melt and shape the wax to fill the gap or crack smoothly, making sure to avoid air bubbles or uneven layers. It’s vital to use the appropriate temperature and follow the instructions for the repair wax.
Finishing Touches
Smoothing the Surface
Once the wax has cooled, carefully smooth any uneven surfaces or bumps to create a seamless finish. Use your tools and techniques to ensure the repaired area blends seamlessly with the surrounding candle. This step requires care to avoid creating more imperfections in the repair. The blending process is key to creating a professional and visually appealing repair.
Preventing Future Damage
To ensure your candles remain intact for a longer time, you might want to consider taking precautions to avoid future damage. Secure the candle in a safe position and store it in a protected location.
Advanced Techniques
Repairing Larger Cracks
When dealing with larger cracks or extensive damage, advanced techniques might be necessary. Techniques like using specialized candle repair kits or using multiple layers of wax to fill the gaps might need to be employed. These advanced techniques are important when the damage is beyond the scope of basic repair.
Working with Shattered Candles
Shattered candles can be challenging to fix, but it’s possible to restore them to their original shape and condition. Different techniques might be needed to manage shattered wax and candle structure.
Additional Tips and Tricks
Choosing the Right Tools
Having the right tools is crucial for success. Invest in a hot knife, tweezers, specialized wax, and a clean workspace. With the right tools, candle repairs are often easier to manage.
Safety Precautions
When working with hot wax, prioritize safety. Wear appropriate gloves and work in a well-ventilated area. Follow manufacturer instructions and safety guidelines.
Environmental Considerations
Promoting Sustainability
Repairing broken candles can extend their lifespan. This reduces the need to buy new candles and helps you to practice sustainability.
Choosing Eco-Friendly Products
When choosing candle repair wax, look for eco-friendly and sustainable options.
Frequently Asked Questions
How do I choose the right repair wax for my broken candle?
Selecting the right repair wax depends largely on the type of wax used to make the candle. Paraffin wax needs a different repair wax than soy wax. Refer to the manufacturer’s instructions for the specific repair wax type required to effectively and safely restore the candle to its original condition.
What tools do I need for repairing broken candles?
A few essential tools include a hot knife, tweezers, specialized candle repair wax, and a clean workspace. The use of a hot knife for shaping wax and tweezers for precise applications are essential. A clear workspace is important to prevent mistakes and accidents.
In conclusion, repairing broken candles is a satisfying and often rewarding process. By understanding the different types of candle damage and the appropriate repair techniques, you can breathe new life into your favorite candles and avoid costly replacements. Remember to prioritize safety and use appropriate tools for the job. With practice, you’ll become proficient in restoring broken candles to their former glory. Ready to try repairing your broken candles? Find the right tools and supplies now!